 |
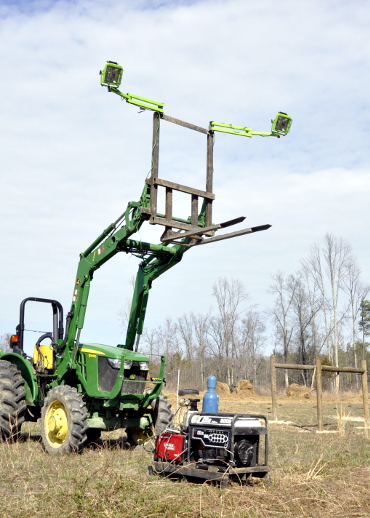
| The tractor sporting its newly fabricated forklift attachment with detachable lights and the generator and welder in the foreground. This is a major improvement over the bucket fork attachment I had previously fabricated. While the previous attachment did work, it exerted too much concentrated force on the blade of the bucket and eventually caused damages that needed specialized repairs. Also, because the loader bucket remained attached in the previous design it was much harder to actually see how the fork was positioned from my seat in the tractor. As a bonus I've added a place to attach detachable lights on the forklift. This allows the tractor to double as a light tower at night. |
 |
| In addition to powering the welding equipment, the generator is also used to power two halogen lights that I've modified to be detachable. In this photograph the lights have been attached to the interior surface of the shipping container doors to provide work area illumination. |
 |
| A detail of the light fixture attachment. It's basically just two steel rods welded to the fixture mounting plate and four nuts welded to whatever I want to mount the light on. |
 |
| To ease transportation a steel platform or pallet was created for the generator and welder. The generator itself weighs about 200lbs and the welder is about 100lbs. The gas tanks next to the welder contain inert shielding gases. |
 |
| In addition to the pallet fork and generator platform, I've also been working on creating a shelving system that allows me to store more items and access those items more easily. Based upon my assessment of the shipping container's design, the walls of the container are not intended to be load bearing. Most of the downward force exerted by any cargo in the container is supposed to be channeled through the floor structure to the bottom four corners of the container. For that reason I decided that it would be best for me to create a steel frame inside the container upon which any shelving units could be placed. This steel frame is not attached to the walls of the container and transfers all of its weight directly to the container's floor. This photograph shows the partially built frame (upside down) being assembled outside the container. |
 |
| The nearly completed frame being moved into the container with the front-end loader. The frame will have a total of six legs when completed. |